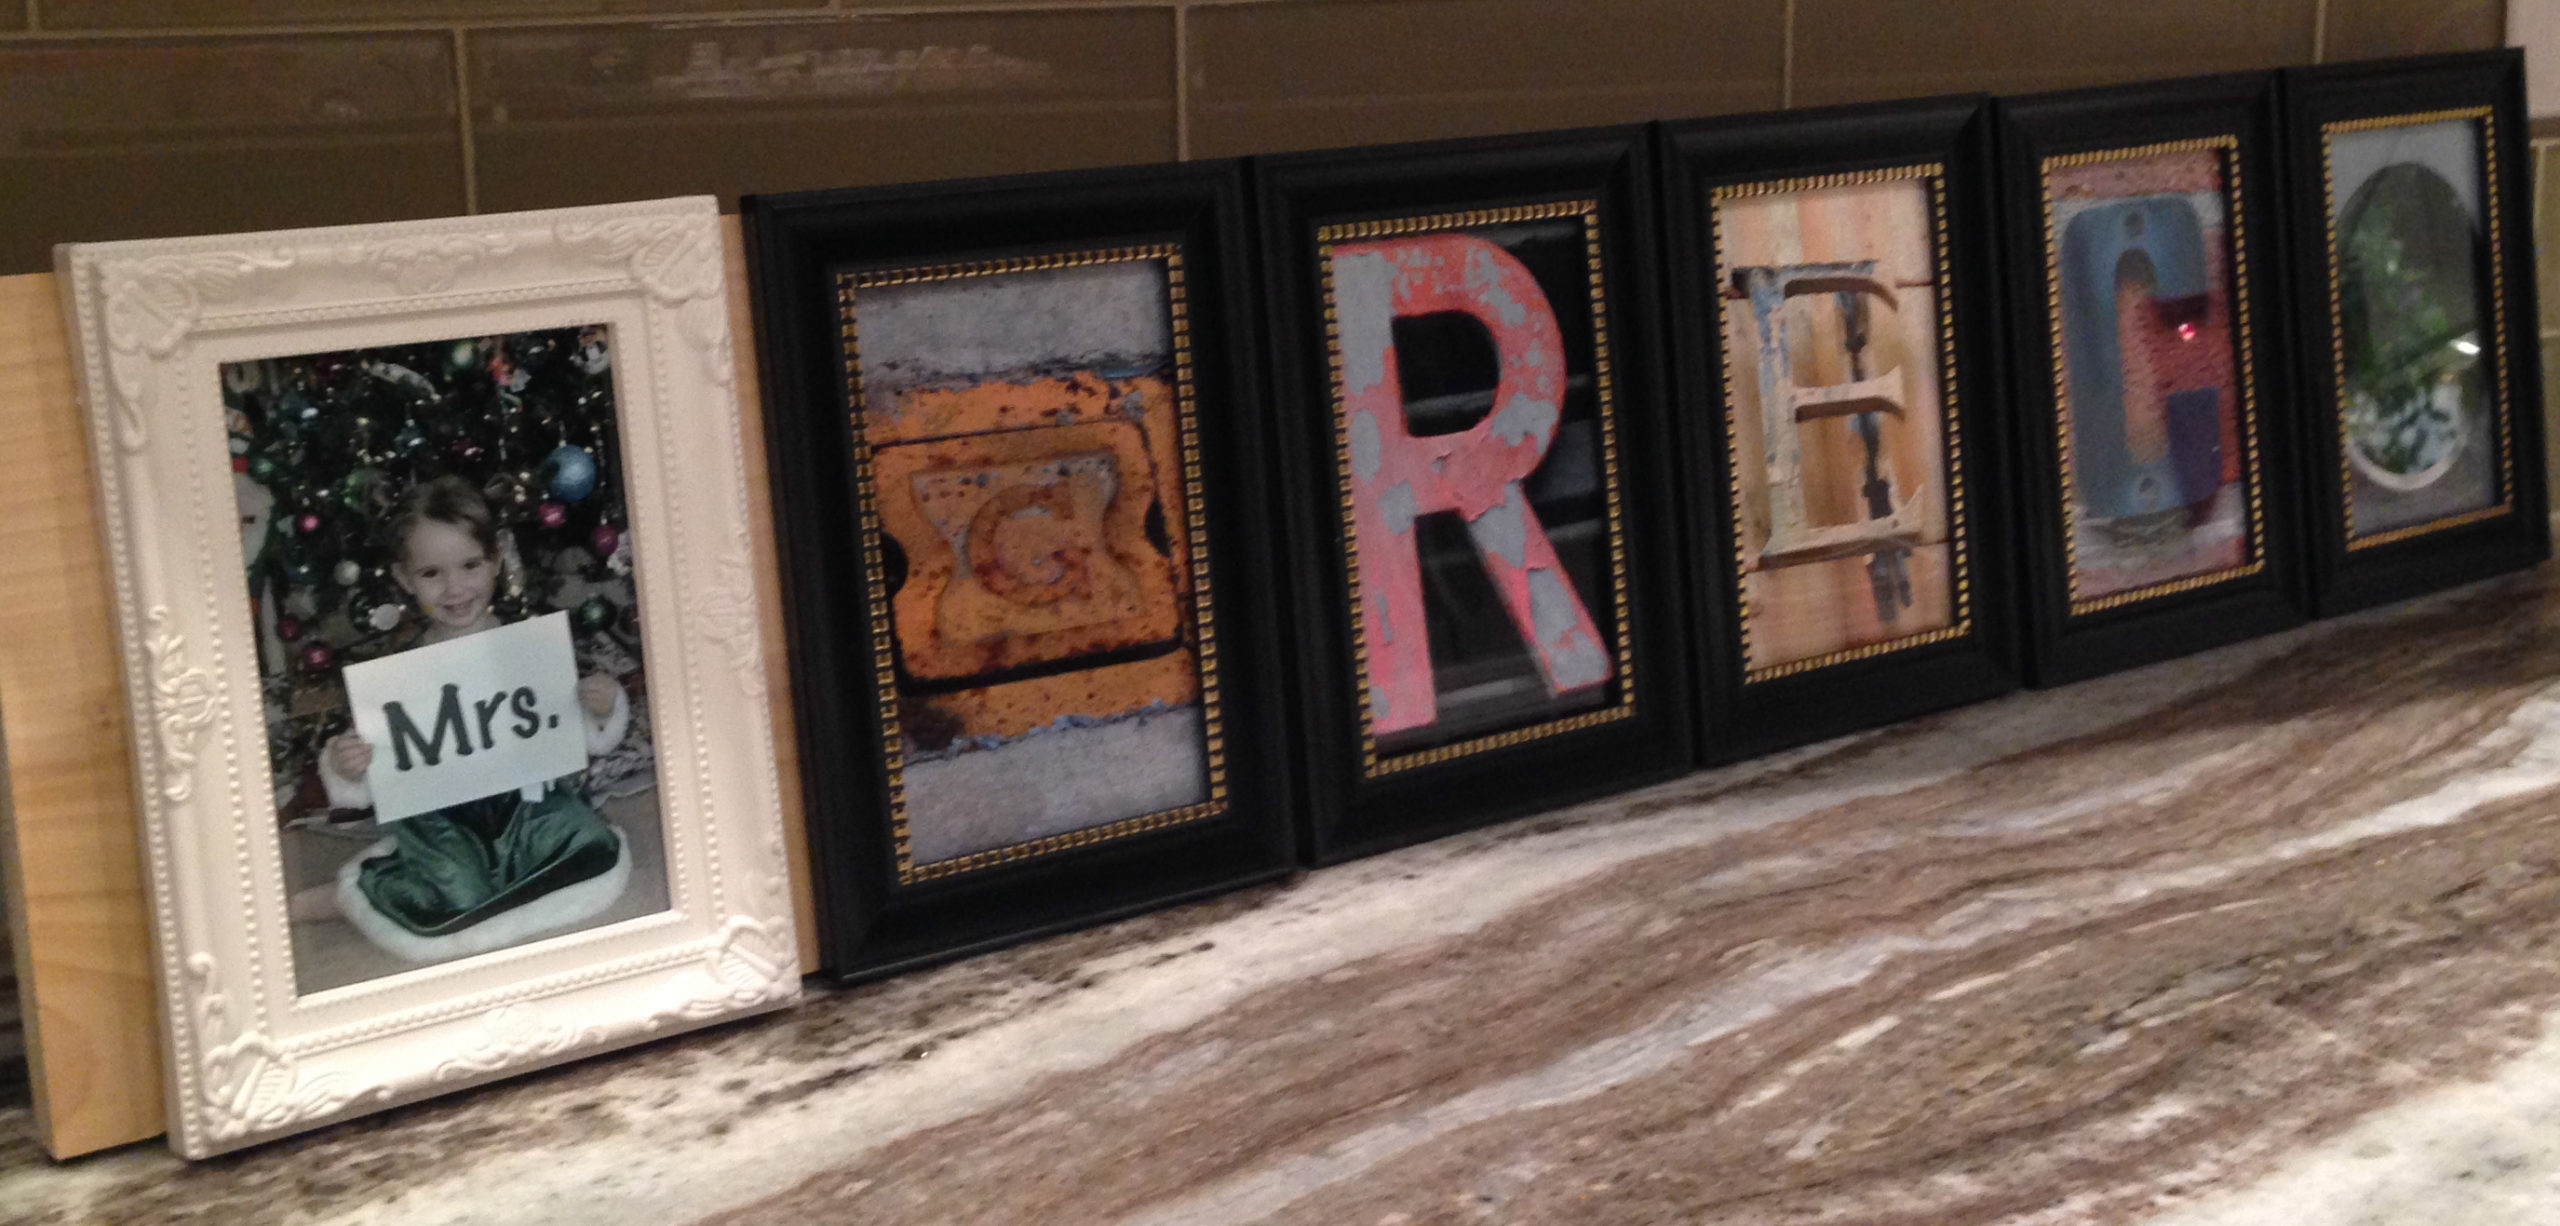
I made this personalized alphabet art for my daughters teachers at her school for Christmas… and they LOVED it, so I had to share.
You will need wood, picture frames, printed letters, glue, and picture hangers. Paint and wood stain are optional.
First, you need the letters to spell the name of the person you are gifting. You can buy these at a store like Hobby Lobby, but they are expensive – something like $2 a letter. You can search online and send them to Walgreens or CVS to have them printed, or just take the pictures yourself when you are out and about.
Second, you need to count the letters of the name of the person you are gifting. In this case, the teacher’s name is Mrs. Greco. To save space, I took a picture of my daughter with a sign that said, “Mrs.” and it also helped to make it even more personal. (Since it was a Christmas present, she was wearing her Christmas dress by the tree.) So, that would count as 1, then the rest of the name = 5, for a total of 6.
Third, I went to the dollar store and bought six frames. You can spray paint these if you want to go with a different color. You will need to break the stand off the back since you will glue these onto wood. Since they are dollar store frames, it’s pretty easy to do.
Fourth, head to the lumber department at Home Depot or Lowe’s. There is a lot to choose from, but remember this is something that will most likely be hung on a wall, so you don’t need it to be too thick. Once you find a slab, do your best to measure how many frames will fit on it to complete the name you are spelling. Remember to give yourself some slack so the frames aren’t too close to each other. (To fit six frames, I went with 32 inches.) An employee will cut it for you right there in the department.
Fifth, before you check out, make sure you buy a couple of picture hangers to nail to the back of the wood (and pick up some Gorilla glue if you don’t already have it.) If you want to paint the frames or wood, pick up some spray paint too.
Now you are ready to assemble! If you want to paint or stain the wood, do that first. While you are waiting for that to dry, put your letters in the frames. Next, line the frames up to make sure you like the spacing and the way it looks. When you get it set to your liking, one by one glue the frames to the wood. (If you are using Gorilla glue – you will need to dampen the area first… and do not apply too much glue. Keep it away from the edges because Gorilla glue expands after you apply it! I learned that the hard way.) After you get it all glued down, let it dry. Hammer the picture hangers on the back (if you didn’t do it at the beginning) and you’re done!

